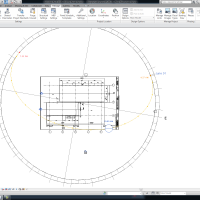
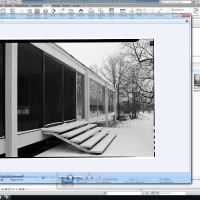
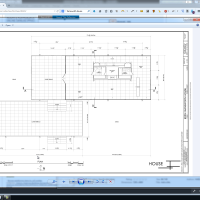
OK so the first thing I'm going to do is open up a new project and I'm a do it based on the default architectural template that should be good enough for our needs right now. So I'll click on that it should open up a new window for us and as you can see there's the properties window here in the floor and the project browser here and it's got a couple of levels set up for us let's go ahead and name these levels based off of the drawing that we're going to be documenting here… So I just opened Rhino up for some reason. So I want to look at the floor plan here let me close Rhino did not mean do not mean to do that. We're going to call this lower terrace what was level one so over here where it says level one right click and rename this and we'll call it lower terrace. If I spelled that correctly yes I would like to rename all the corresponding views and then level two we are going to call up or terrace. So I'm going to rename that. I'll call this upper terrace. okay yes rename corresponding view this site view I'm going to delete it for now I don't need that. And so we have a lower terrace and upper terrace and we have ceiling ceiling plan for the lower terrace which doesn't make sense so I'm going to delete that. So now we just have these the elevations make sense east north south and west so we can leave that as is. Let's go set some levels though. Let's say choose and elevation here that makes sense. We'll look at the south elevation. So I'll go to the South elevation here and you can see where we have our upper terrace and lower terrace level so the lower terrace level should be good based on what we are looking at earlier we see the lower terrace elevation is set at 0' 0" there is what we're calling the upper terrace right now is actually the main floor maybe should rename that so let's rename that from upper terrace I'll right click and call it main floor and yeah we'll and rename those so we have that and let's call we need to create some levels for a few other things here so we have main floor right now let's go to the WT to tile my windows so I can look at the elevation the south elevation so what I'm going to do is on click on this and change that elevation height so what was it 2 foot 2"? Sorry 2'4" So I'll set that at 2 foot 4 inches. So now the main floor is just 2'4" over the lower terrace which is correct now I have a ceiling here of 11'9" so we can create a level for that. I'll take this level and we already have a ceiling plan created so this level we don't actually need to create a ceiling plan we can just kind of copy this one up and there's a couple of ways. We could copy paste we could copy to clipboard a couple of ways but I think what I'll do is just to Ctrl+C then Ctrl+V. Copy and paste. Although it pasted by the end point there so let me just align those with AL to align actually we can just drag this guy over and I'll drag this one over. So this thing is called level 3 one thing to note that is interesting about Revit is if this thing has a specific view tied to it it has a blue elevation marker if it does not if it's just a level that you're using it will have a black elevation marker. So this means it has a link to view this means it does not. We can click it and create a view from it there's a couple of ways to do that, but in this case we don't want to create a view we are just going to use it to set some heights let's set this level to be what did I say 11'-9" and will set this to be 11'9" and it will move it up so now we have a couple more elevations to do actually just one the top of cornice and we'll consider that the top of our building. there's a bump out projection here and I don't know if we have any dimensions for that it looks like we don't. So we'll say the top cornices is the the top of the building so we can create another one of these so this time I will do it by doing typing in CO and this will allow me to copy up. So I'll copy it up some random number and I'll just change the elevation so I'll set this to be 13' 6". Okay so those are our levels, I'll rename them so this one I'll double click and I'll call this top of cornice and this guy it's a little hard to see because of the view scale let's switch the view scale to 16th no sorry I want to go bigger let's do quarter inch so this will to the top of ceiling actually what do they call it just ceiling so we'll call it ceiling . Okay main floor Lower Terrace and then ceiling and top of cournice there is a another level which is below grade here or below the 00 they're calling it the grade at stair which is approximately -2'2" so we'll include that because we have a stair landing to go touchdown on that the rest of the grade we're going to ignore for now so let's go ahead and do that so again this time I'll do CO and wei'll copy this level down and that is -2'2" so -2 feet two inches and this we'll call grade at stair so that's our levels and so in the next video we'll look at starting the plans.


Comments
danrichardson replied on Permalink